
It’s a frustrating scenario: you set your thermostat to a cozy 21°C, but the house feels like an icebox – or worse, a sauna. When your thermostat and your actual home temperature aren’t in sync, it’s more than just a comfort issue; it’s a drain on your wallet.
This guide breaks down why your thermostat might be lying to you and how to fix it.
- The Impact of Inaccurate Readings
- Common Causes & Solutions
- Quick Fixes You Can Do Now
- When to Upgrade Your Thermostat
Contact Ideal Heating today for a comprehensive inspection to assess why your thermostat isn’t getting to the right temperature.
Key Takeaways
Location Matters: Sunlight or drafts can “trick” your thermostat.
Maintenance is Vital: Dust and old batteries are common, easy-to-fix culprits.
Calibration: Mechanical and digital thermostats sometimes need a manual reset or recalibration.
Efficiency: An inaccurate thermostat can increase energy bills by 10% to 15% due to unnecessary cycling.
1. The Hidden Impact of Inaccurate Readings
When your thermostat fails to reflect the true temperature of your home, the consequences extend far beyond a minor chill or a bit of sweat.
Because the thermostat acts as the “control center” for your entire HVAC system, a discrepancy of even two or three degrees can trigger a domino effect of mechanical and financial issues.
A Blow to Your Monthly Budget
Energy efficiency is built on precision. When a thermostat is improperly calibrated or poorly placed, it forces your system to work overtime.
Over-Cycling: If the thermostat thinks the room is warmer than it actually is during winter, it will shut the furnace off prematurely, leading to “short-cycling.” This uses a massive amount of electricity or gas just to frequently restart the blowers.
The 3% Rule: Industry experts estimate that for every degree your thermostat is off, your energy consumption can increase by roughly 3%. An inaccuracy of 5°F could be adding 15% to your monthly utility bill without providing any extra comfort.
Premature System Wear and Tear
HVAC systems are designed to run in steady, predictable cycles. Inaccuracy disrupts this rhythm:
Component Stress: Constant starting and stopping puts immense strain on the compressor (in AC units) and the igniter (in furnaces).
Shortened Lifespan: A system that cycles twice as often as necessary will likely reach its “end of life” years sooner than expected, leading to a premature—and expensive—replacement.
Compromised Indoor Air Quality (IAQ)
Your thermostat doesn’t just regulate heat; it indirectly manages humidity and filtration.
Humidity Issues: An air conditioner needs to run for a specific duration to effectively pull moisture out of the air. If a faulty thermostat shuts the system down too early, the air may feel cool but “clammy,” leading to potential mold growth or dust mite infestations.
Stagnant Air: Inaccurate readings often lead to long periods where the fan isn’t running, meaning your air isn’t being pulled through your high-efficiency filters, allowing allergens to settle.
The “Thermostat War” Phenomenon
Beyond the mechanics, there is a human cost. When the display says 72°F but the room feels like 68°F, household members often begin “cranking” the dial to compensate. This manual overcorrection leads to extreme temperature swings, making the home environment inconsistent and stressful for everyone living there.
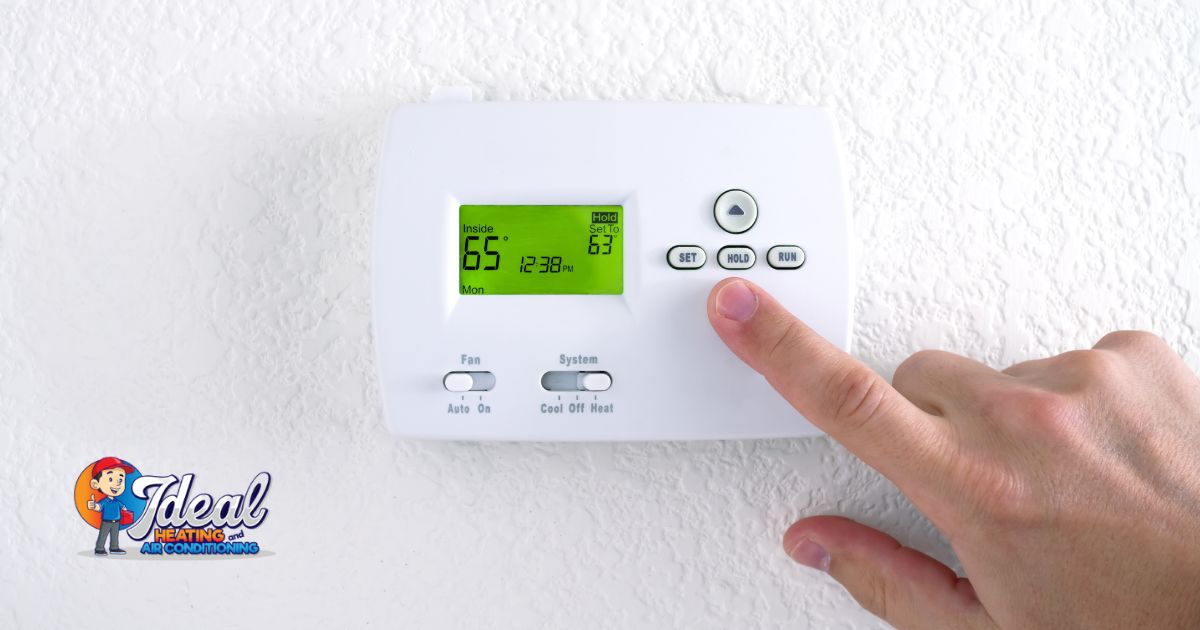
2. Common Causes & Solutions
Poor Placement (The “Ghost” Temperature)
If your thermostat is in a hallway near a drafty door or in direct sunlight, it isn’t measuring the “average” temperature of your home.
The Fix: Ensure it is mounted on an interior wall, away from windows, air vents, and heat-generating appliances like lamps or ovens.
Calibration Issues
Over time, the internal sensors can drift. Mechanical thermostats (with the manual dial or slider) are particularly prone to this.
The Fix: Use a separate glass thermometer to check the room temp. If they don’t match, check your manual for “calibration mode” (digital) or gently clean the bimetal coil (mechanical).
Wiring and Power Problems
Loose wires or corrosion can disrupt the electrical signal between the thermostat and the HVAC unit.
The Fix: Turn off the breaker, remove the faceplate, and ensure all wires are firmly tucked into their terminals. If the screen is flickering, replace the batteries immediately.
Sensor Failure
The thermistor (the component that senses heat) can simply wear out.
The Fix: If the thermostat displays an error code or fluctuates wildly (jumping from 70 to 90 degrees in seconds), the sensor has likely failed, and the unit needs replacement.
3. Quick Fixes You Can Do Now
Before you reach for the phone to call an HVAC technician – or your credit card to buy a new unit – try these low-cost, high-impact fixes.
Many “broken” thermostats are simply suffering from minor environmental interferences that can be resolved in minutes.
Step 1: The “Deep Clean” (Dust and Debris)
If you have an older mechanical thermostat or even an early digital model, dust is your primary enemy. Over months and years, a layer of household grime can coat the internal sensors, acting as an unintended layer of insulation.
The Process: Remove the faceplate gently. Use a soft-bristled brush (like a clean makeup brush) or a can of compressed air to blow out the interior.
Focus Areas: For mechanical units, pay special attention to the bimetal coil. For digital units, ensure the small vent holes on the casing are clear of lint.
Step 2: The Level Check
This is a “secret” fix for older thermostats that use a mercury switch (a small glass bulb with a silver liquid inside). These switches rely on gravity to complete an electrical circuit.
The Process: Place a small bubble level on top of the thermostat. If it’s tilted even slightly to one side, the mercury won’t tip correctly, causing the furnace to stay on too long or not turn on at all.
The Fix: Loosen the mounting screws, adjust the unit until it is perfectly level, and retighten.
Step 3: Battery Refresh (Even if the Screen is On)
Many homeowners assume that if the digital display is visible, the batteries are fine. This isn’t always true. Low voltage can cause the internal sensor to “drift” or lose its ability to send a strong signal to the HVAC system.
The Process: Replace old batteries with high-quality alkaline batteries.
The Pro Tip: Avoid using rechargeable batteries in thermostats; they often have a slightly lower voltage output that can cause erratic readings in sensitive electronics.
Step 4: The Draft Block
Sometimes the problem isn’t the room temperature—it’s the temperature inside the wall. If the hole where the wires come through the drywall is too large, cold or hot air from your attic or crawlspace can blow directly onto the thermostat’s sensor.
The Process: Pop off the cover and look at the hole where the wires emerge.
The Fix: Stuff a small piece of foam insulation or even a bit of plumber’s putty into the hole to seal it. This prevents “wall drafts” from tricking the sensor into thinking the room is colder or hotter than it really is.
Step 5: Verify with a “Control” Thermometer
To prove your thermostat is the problem, you need a second opinion.
The Process: Tape a standard glass or digital kitchen thermometer to the wall about an inch away from the thermostat.
The Test: Wait 15 minutes. If the two readings differ by more than 2°F, you have confirmed a calibration issue rather than an HVAC mechanical failure.
4. When to Upgrade Your Thermostat
If you’ve tried the quick fixes and your home still feels like a climate roller coaster, it may be time to admit your thermostat is a relic.
Thermostat technology has advanced significantly in the last decade, moving from simple “on/off” switches to predictive computers that learn your lifestyle.
Here are the signs that an upgrade is no longer optional, but a smart investment.
The 10-Year Expiration Date
Like any electronic device, thermostats have a lifespan. Most manufacturers suggest replacement every 10 years. Over time, the internal components—specifically the thermistor (the heat-sensing resistor)—lose their precision. If your unit is over a decade old, its “drift” is likely permanent, and no amount of recalibration will bring back its original accuracy.
Moving From “Manual” to “Programmable”
If you are still using a manual slider or dial, you are likely losing money every single day.
The Precision Gap: Manual thermostats often have a “swing” of 3=5 degrees before they trigger the system.
The Human Error Factor: Modern programmable units allow you to set “setbacks”—automatically lowering the heat when you’re at work or asleep. This can save you an average of $180 per year in energy costs.
The Power of Smart Integration
Upgrading to a Smart Thermostat (like Nest, Ecobee, or Honeywell Home) solves the “bad placement” problem entirely through Remote Sensors.
Zonal Control: If your thermostat is stuck in a drafty hallway, you can place a tiny remote sensor in your actual living room or bedroom. The system will then ignore the hallway temperature and focus on where you actually spend your time.
Geofencing: Many modern upgrades use your phone’s GPS to know when you’re heading home, pre-heating or cooling the house so it’s exactly the right temperature the moment you walk in.
Compatibility with New HVAC Equipment
If you have recently installed a new, high-efficiency furnace or AC unit, an old thermostat might actually be “handicapping” your new system.
Multi-Stage Systems: Modern HVAC units often have “Stage 1” and “Stage 2” heating/cooling. An old thermostat can’t communicate with these stages, forcing your expensive new system to run at 100% power all the time, which defeats the purpose of buying a high-efficiency model.
Summary: Should You Upgrade?
| If your thermostat is… | Recommendation |
| A manual mercury dial | Replace Immediately. These are inefficient and contain hazardous materials. |
| A non-programmable digital | Upgrade Soon. You’re missing out on significant energy savings. |
| 10+ years old | Replace. The sensors are likely failing or are inaccurate. |
| In a bad physical location | Upgrade to Smart. Use remote sensors to bypass the bad wall placement. |
Thermostat Is Not Getting to the Right Temperature? Call Ideal!


Ideal Heating understands that a thermostat that’s not getting to the right temperature can be an expensive and uncomfortable problem.
Our professional technicians are fully TSSA-certified and specialize in diagnosing why your air quality is suffering and how to improve it.
By partnering with Ideal Heating to optimize your system, you gain:
Maximized Efficiency: Precision tuning and calibration to restore peak performance, immediately reducing unnecessary run-time and lowering your monthly energy bills.
Expert Diagnostics: Accurate identification of hidden issues like refrigerant leaks or sizing errors that DIY maintenance can’t catch.
Peace of Mind: Confidence that your system is running safely and delivering the most comfort for the least cost.
Priority Service: Preferred treatment and rapid response times should any unexpected issue arise, saving you from stressful emergency situations.
Don’t continue to pay for wasted energy. Be proactive and secure your home’s most vital systems today. With over 35 years of experience serving customers in the GTA and a 5-star rating on Google Reviews, we provide the ideal advice.